The Art of Map Making
I make maps you can print, but I am willing to help you with the online map tools.
I work on a Mac and like to use Graphic, but I recently tried the Affinity products. Affinity Designer is very good. For $50 it is an excellent purchase, and sometimes it is on sale! It is easier to make curves with it than to use Graphic, a vector program.
You could use Photoshop, it uses pixels, but if you want a clean line use a vector program, like Illustrator or Affinity Designer, which uses exact numbers to create your art.
Vector designs will scale small or larger perfectly. Be aware that Illustrator has a monthly fee.
A free vector program would be Inkscape, but there is a learning curve. Perhaps Vectonator would be a good choice, I believe it’s free too.
CREATING A BASE MAP
SIMPLIFY
A Base Map Using Google Maps
One thing that is disappointing is that though Google Maps is constantly updating their maps, the labels, names of roads and businesses are not what I need for a clean map. I often have to block out sections so I can add my own road names, as the names are too large or have a huge outline.
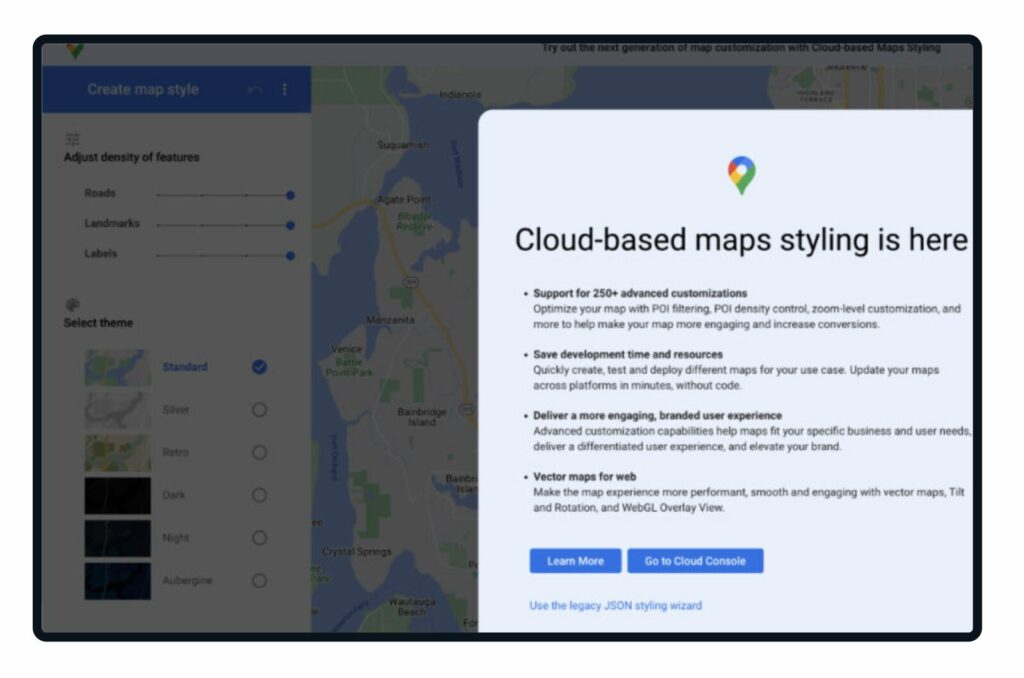
Here is a link to a page that allows you to turn the labels off of a Google Map. Go to https://mapstyle.withgoogle.com/
Click on the link “use the Legacy JSON styling wizard” under the blue buttons on the bottom of the large white box.
Zoom out on the page to find your territory on the world map, then Zoom in.
First step
Zoom and scroll the map to navigate to your location. This is what it will look like. The Labels are turned on.
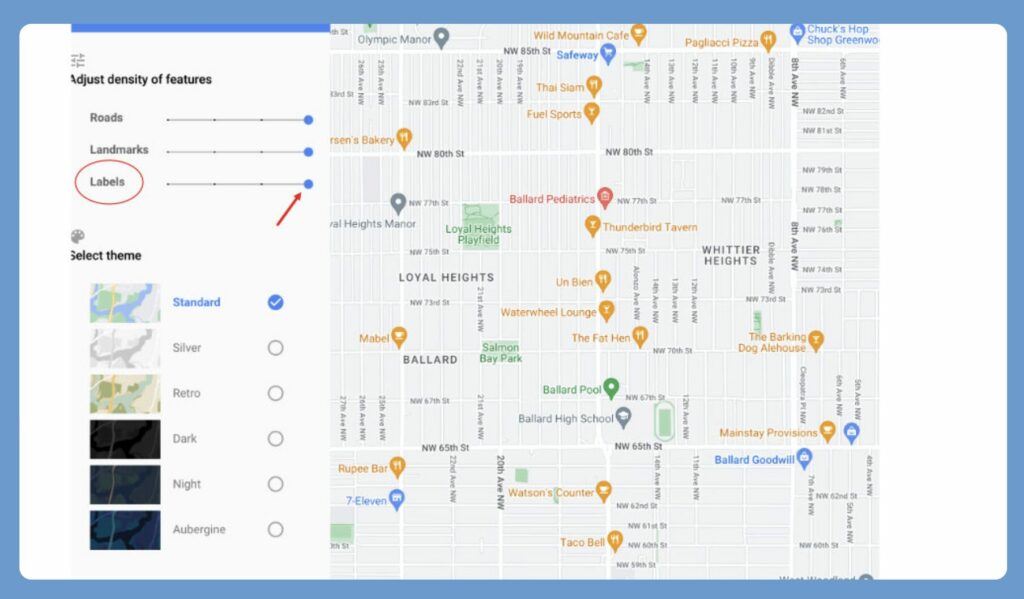
Second step
Drag the Label slider over to the LEFT. This is a pic of the same map. No labels in your way!
Take your screenshot.
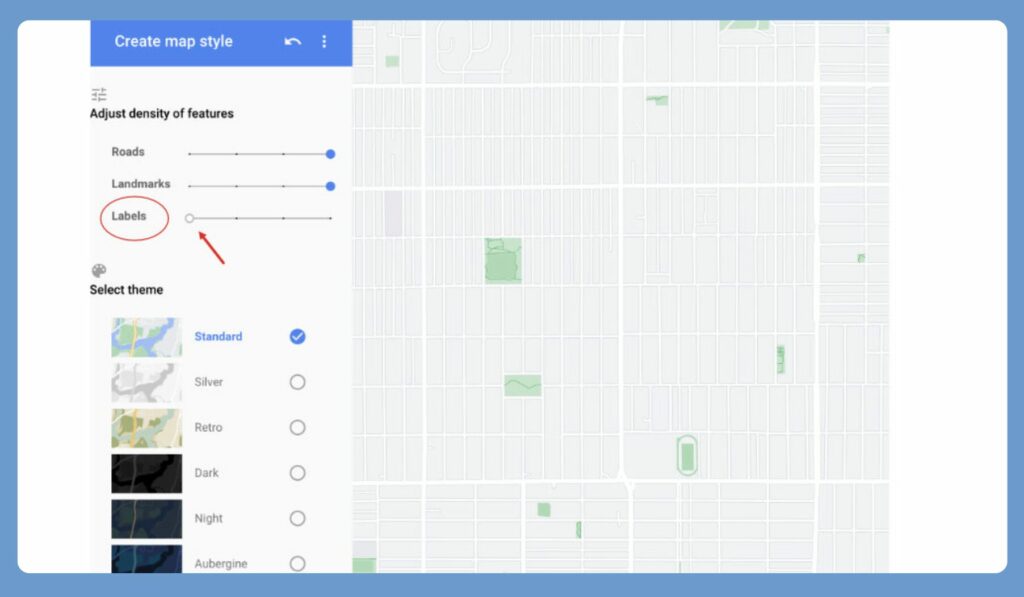
The trouble with this is that you have a fuzzy map
Or SIMPLIFY
A Base Map Using OpenStreetMap.org
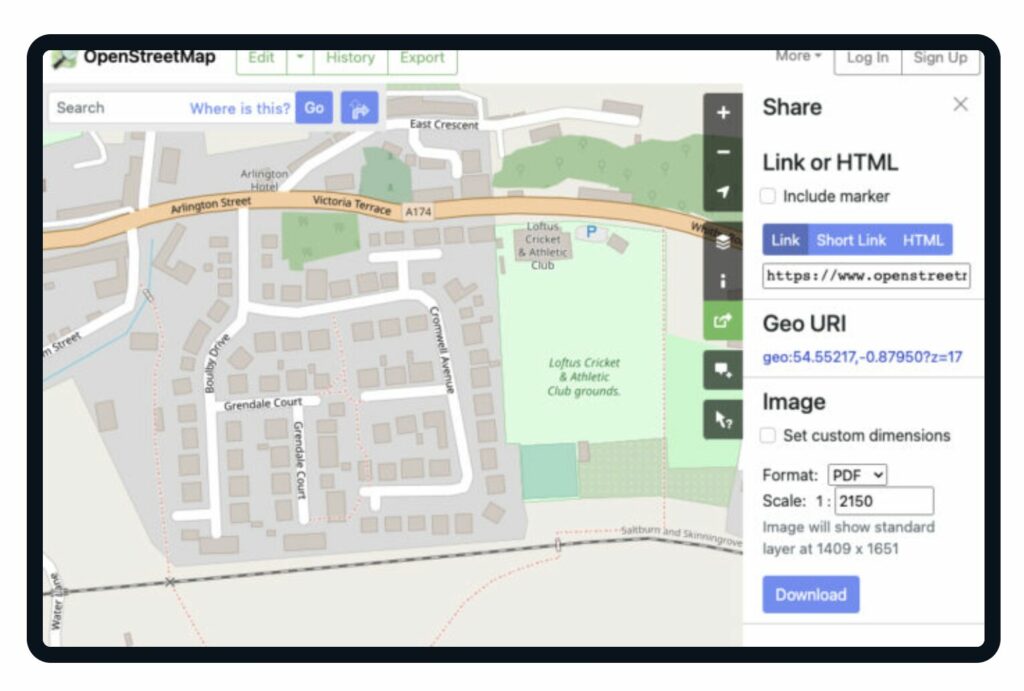
You can also go to OpenStreetMap.org…
- Put your town in the search field on the left.
- Zoom out so you don’t have many labels
- You can save a screenshot or….
- There is a Share arrow on the right menu. This makes a white box appear. Under the word Image, choose your format – PDF, PNG, JPEG, or SVG – (a vector file – it is editable and stays sharp/crisp).
- Click the Download button to save to your computer.
If you choose a SVG file you can make the map more to your liking but it is tedious as there are many layers
THE PROCESS
Our Local Maps

I am presently using Affinity Publisher, much like Illustrator, to make the Wall and Territory maps. If you are not familiar with graphic programs you can find many tutorials on YouTube or courses on Udemy.com. I like to use Affinity Publisher for the small 4×6 cards, but you can make them any size. It’s good for many images that are all the same size.
They can be exported as JPEGs and uploaded to different apps like Territory Servant or NW Publisher. Or you can export them as PDFs.
NEW PAGE
Set up a new page 11 x 8.5 or 8.5 x 11, (or 4×6, if you are creating a S12 territory card), according to the layout you need. I mark the checkbox for the margins to show at .2 points. Make the margin line red so you can see them.
LAYERS
Make 5 layers. Name them from the top to bottom:
- TOP
- TEXT
- ROADS
- SHADE
- MAP

Tip
If you have many territories, you can save time by skipping to the TOP Layer and setting that up. Then save this page as a TEMPLATE. This will make the whole process faster for your future pages. You can choose this template every time you create a new page.
I use OpenStreetMaps.org for my maps, though you can use Google maps. I like to use the OpenStreetMap.org Cycle map layer and if you zoom out far enough it will eliminate the street names for the most part. Make your browser full screen and capture the area you need for your map. I use Monosnap on my Mac computer to capture the screenshot.
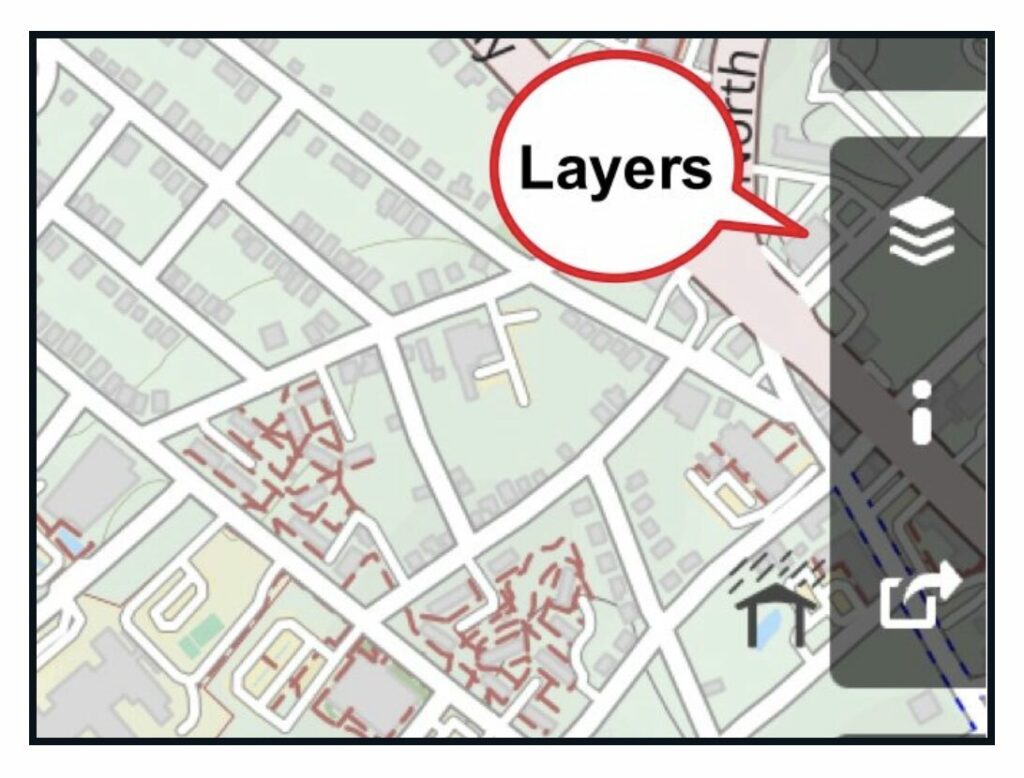
You can see the SHARE button right below the Cycle Map label. It is a box with an curved arrow coming out. This Share button is the one to use to download a PDF or PNG screenshot in OpenStreetMaps.org.

MAP LAYER
Paste the screenshot on the MAP layer of your document. Position it so your territory is in the center of the page. You may need to resize the image or angle the map so it will fit within the page. Lock the layer, (in the layer menu on the right side), so you can work on the document without accidentally moving the map out of place.
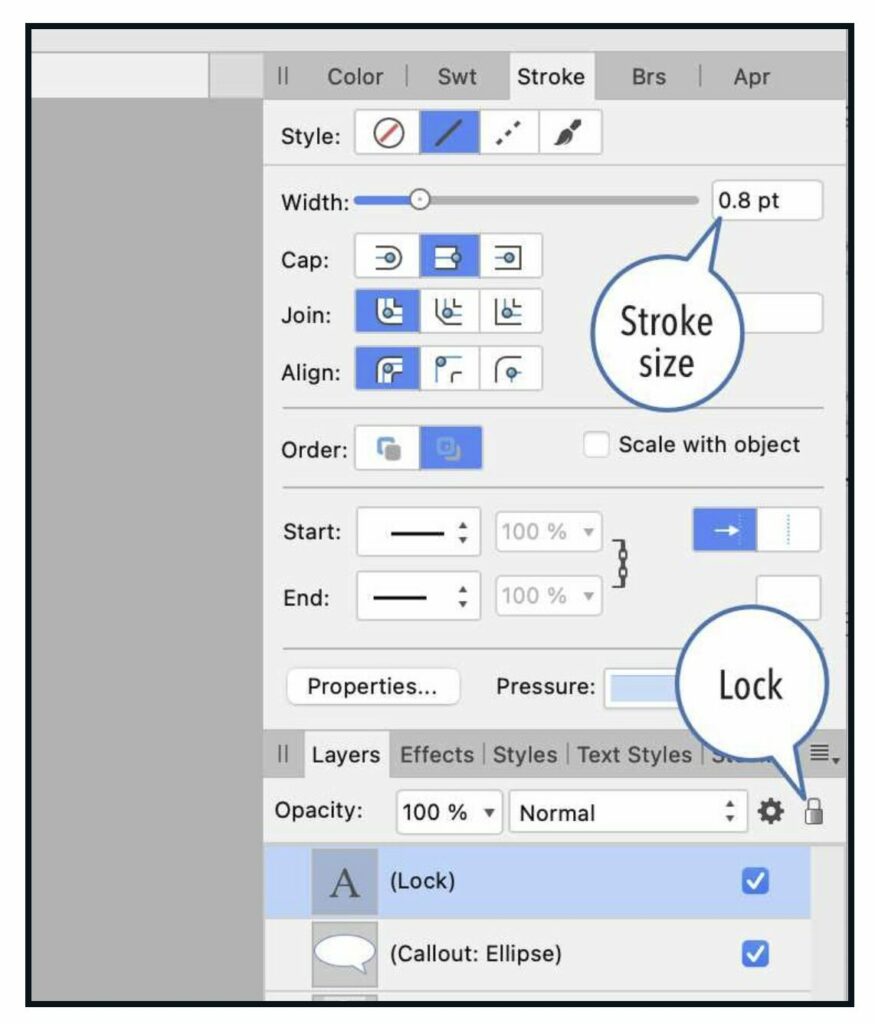
On the SHADE layer, use the Pen Tool to begin drawing the outside perimeter of your territory. I choose a red, 1 point dotted stroke for the outline, no fill. Adjust the curves with the Node Tool, to fit in the center of the roads and fit the shapes.
Lock the layer.


ROADS LAYER
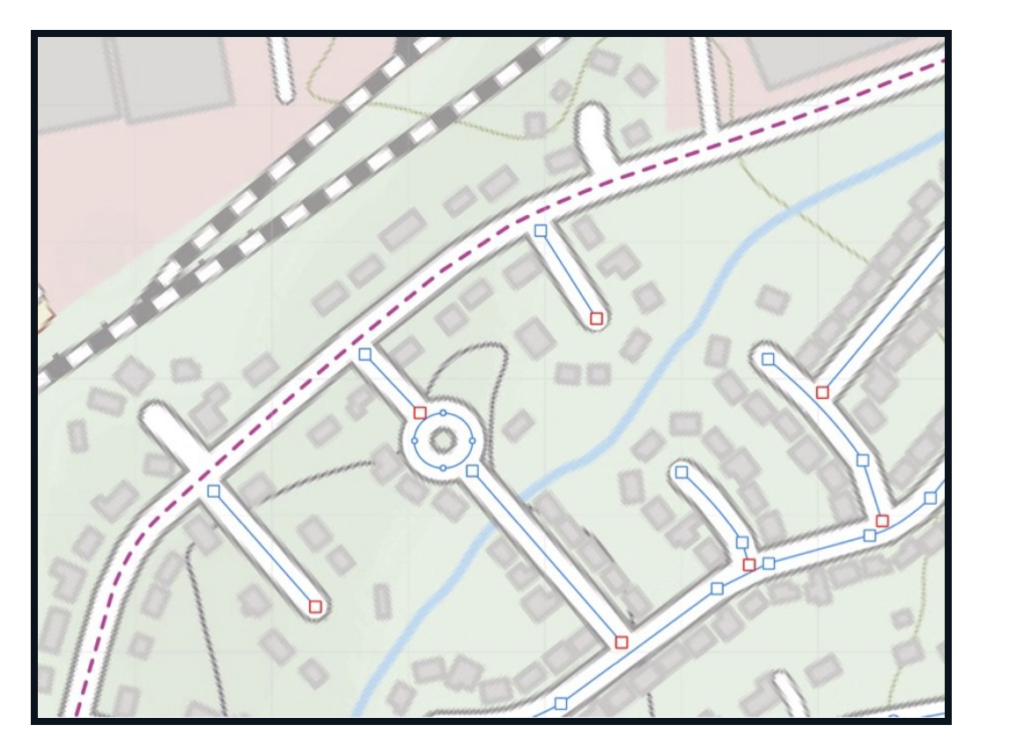
Next I work on the ROADS layer by using the Pen Tool to draw the roads at .5 point. Adjust the lines with the Node Tool.
When you are satisfied that the lines are centered, make the road stroke 3 pts or whatever fits the width of the road.
After everything is adjusted I change the road lines to white.
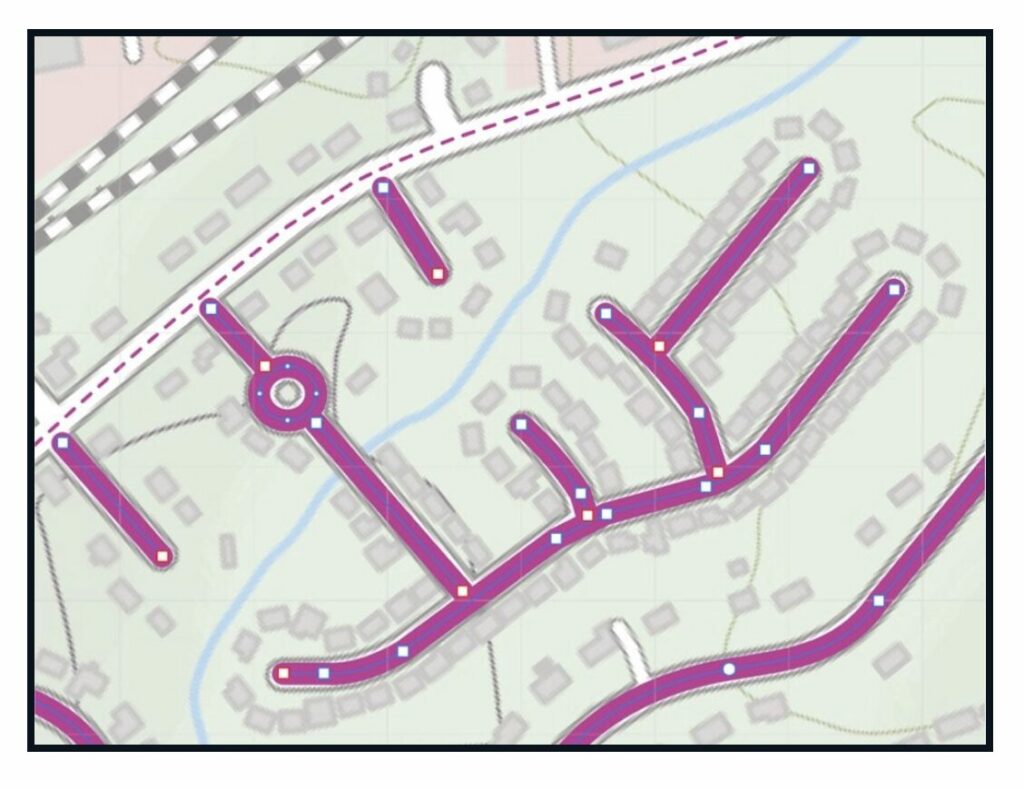
I go to the SHADE layer and unlock it. I change the shape outline to blue and the fill to blue, but I change the opacity of the fill to 25%. Lock the SHADE layer again.
TEXT LAYER
Start to label the roads on the TEXT layer. I use Avenir Next Condensed as my font because it doesn’t take up much room. Drag or angle the names to the appropriate places. You can use the Pen Tool to make a curve if you need your text on a curve. Go to Layer > Convert to Text Path, and begin typing the name.
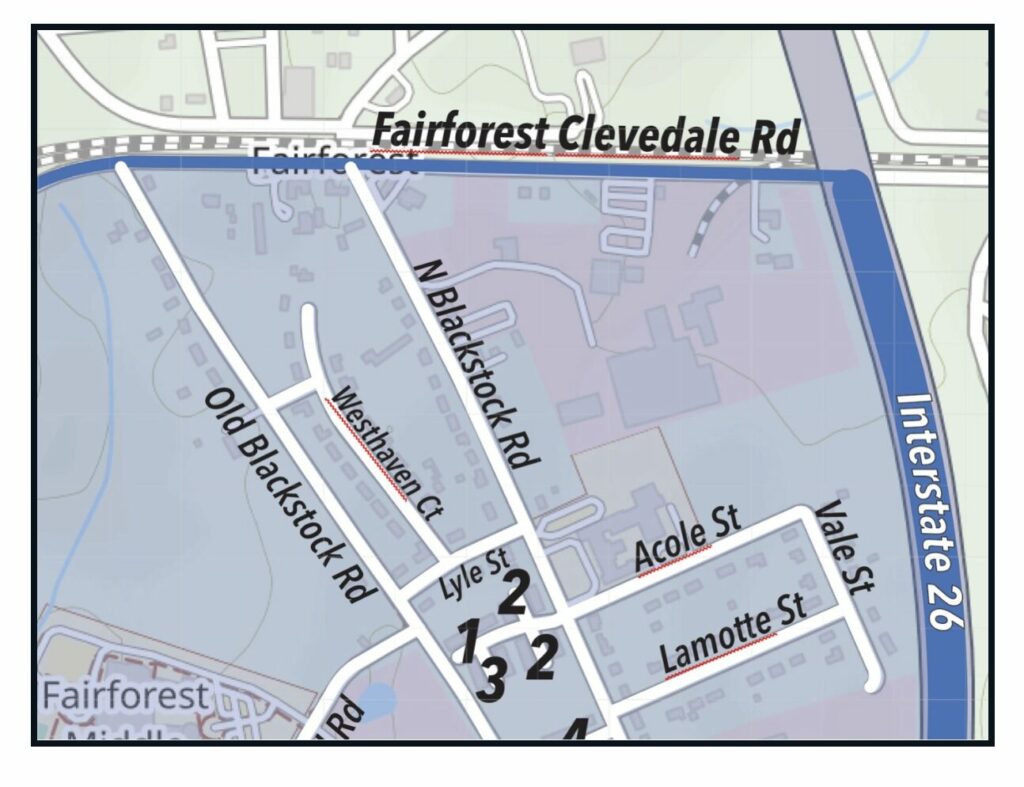
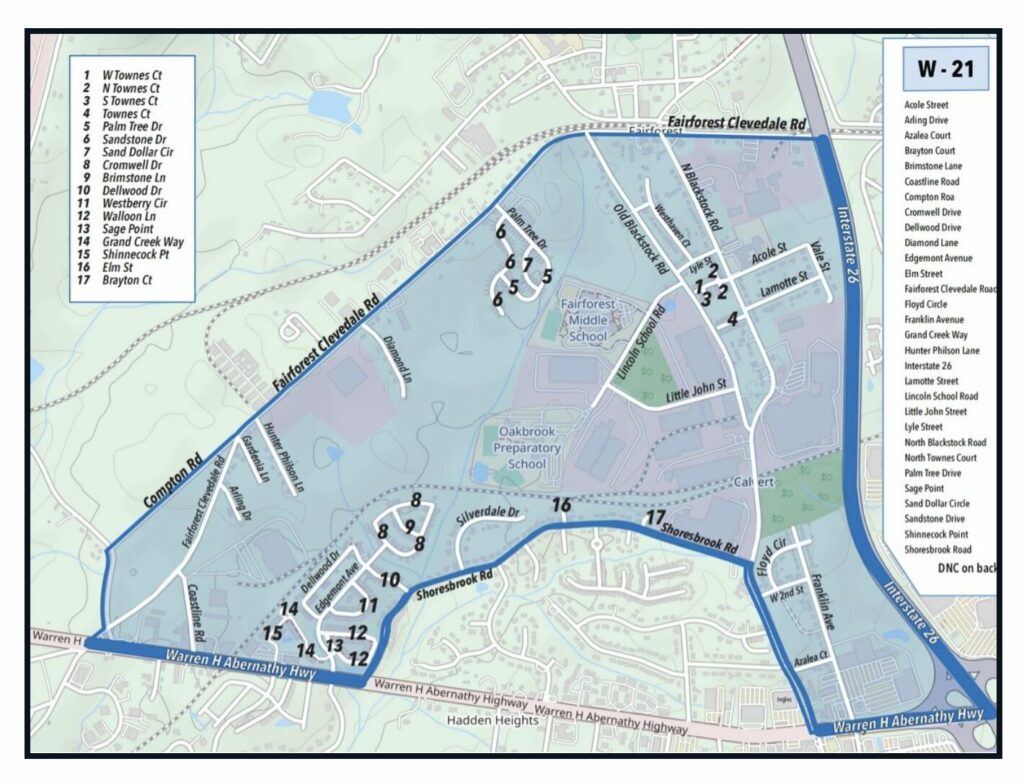
Sometimes things are too small and crowded to enter the names of the road, so I assign numbers to the roads that are affected. I make a separate list of those names but I use a logical numbering progression (clockwise) around the map.
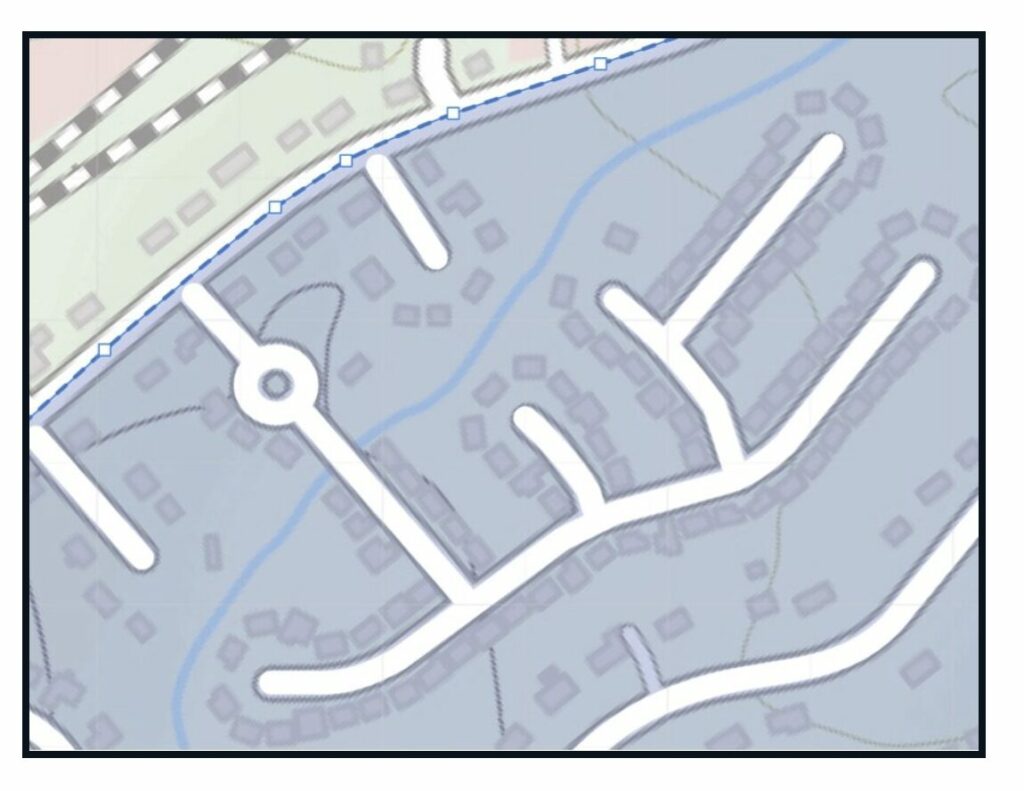
TOP LAYER
Go to the SHADE layer, choose and copy the shape.
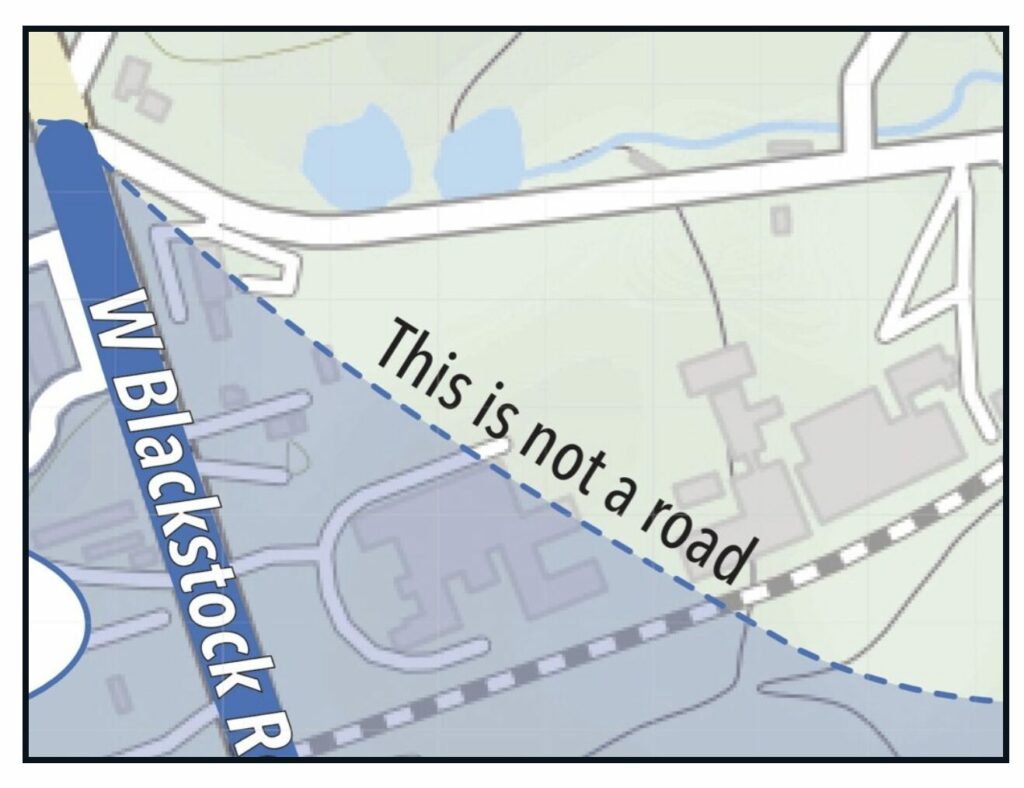
On the TOP layer, I paste a copy of the SHADE Layer. I change the outline to solid blue and make the outline 3 points (or whatever is needed). If the territory has an outline that is not a road, I break the shape by choosing the Break Curve button, and delete the individual nodes of the outline so the SHADE layer shape shows through as a dotted line where there is not a road boundary.
It may be simpler to just redraw a few of the boundary roads again. I size the interstates or major roads to be 6 or 10 points.
I mark the dotted boundary that is not a road, as “This is not a road”.
To make the list of names box, I make a white rectangle on the TOP layer, long enough to go behind the list and a small blue box centered near the top. Add a Text Frame below for the list of road names. Adjust the length of the white rectangle. On the small blue box I add a name or number of the territory, centered, using the Artistic Text Tool.
Sometimes I rotate the box to fit on the page outside the territory if it fits better.
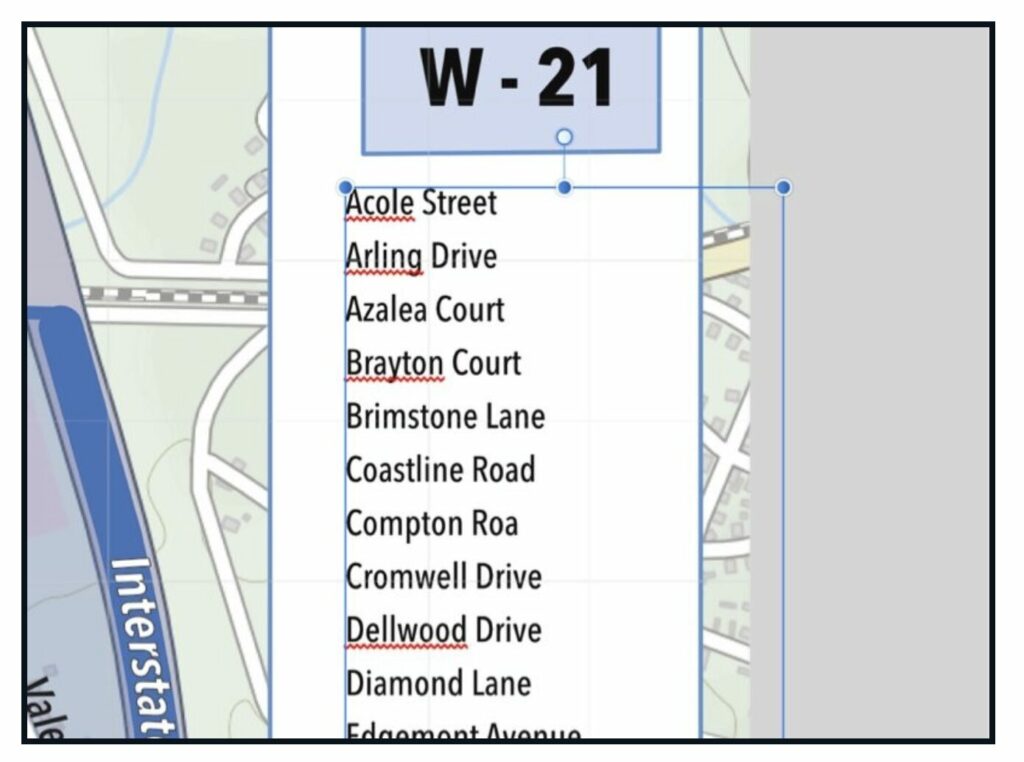
I use a program called CotEditor, which is FREE, and type in all the the road names. This program saves time because you can sort and capitalize easily with it. Go to Text > Sort. Go to Text > Transform > Capitalize. Select All, copy and paste the list into the Text frame in the box.
Go to File > Document Setup. Change the document margins to 0 pixels.
Export your document as a PDF at 300 – high resolution for printing, or whatever you need it to be.
An eBook about: